
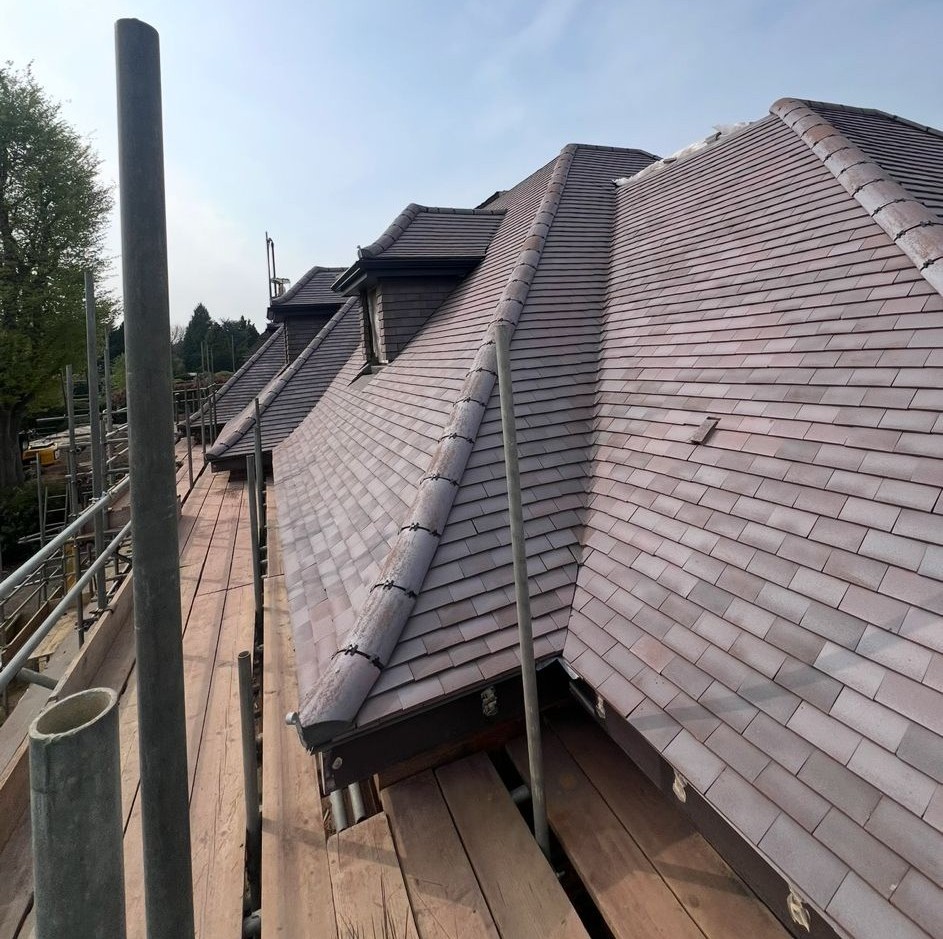
A new roof is one of the most important investments you can make in your property, and understanding how the process works can help you plan with confidence. Whether it’s part of a new build, a major renovation, or a full roof replacement, there are several key stages involved from initial assessment through to final installation.
In this guide, we explain the new roof installation process, outlining what typically happens at each stage so you know what to expect before work begins.
Key Takeaways
- A new roof installation may be required when ongoing issues such as leaks, damaged or missing tiles, visible sagging in the roofline, ageing materials, or frequent repairs indicate that the roof is reaching the end of its lifespan and repairs are no longer cost-effective.
- A new roof installation follows nine key stages: survey and assessment, quotation and planning, site preparation, removal of existing roof (if applicable), structural repairs and roof deck preparation, installing underlay and weatherproofing, installing the new roofing material, finishing details, and final inspection and clean-up.
- Miller Roofing provides professional roof installation in Surrey for residential and commercial properties, delivered by an experienced, fully accredited team focused on quality workmanship, clear communication, and reliable project delivery.
Signs You May Need a New Roof
Knowing when a roof needs replacing is not always straightforward, as issues often develop gradually over time. In many cases, a full replacement is only required once repairs are no longer effective or the roof is approaching the end of its lifespan.
Common signs that you may need a new roof include:
- Frequent leaks or water ingress, especially if problems persist after repairs.
- Missing, cracked, or slipping tiles or slates.
- Sagging or uneven roof structure, which may indicate underlying issues.
- Ageing roof materials, typically ranging from 20 to 50 years, depending on the system.
- Recurring repair work, where ongoing maintenance becomes increasingly frequent or costly.
If several of these issues are present, it may be more cost-effective in the long term to consider a full roof replacement rather than continued repairs.
Did You Know? Alongside new roof installations, Miller Roofing also provides roof repair in Woking and can advise on whether a repair or full replacement is the most suitable option for your property.
Also read: Roof Repair: Frequently Asked Questions
View this post on Instagram
Step-by-Step Guide to the New Roof Installation Process
A new roof installation involves a series of clearly defined stages that help ensure the project is completed safely and efficiently.
| No. | Stage |
|---|---|
| 1 | Initial Roof Survey & Assessment |
| 2 | Quotation & Planning |
| 3 | Preparing the Site |
| 4 | Removing the Existing Roof (If Applicable) |
| 5 | Structural Repairs & Roof Deck Preparation |
| 6 | Installing Underlay & Weatherproofing |
| 7 | Installing the New Roofing Material |
| 8 | Finishing Details |
| 9 | Final Inspection & Clean-Up |
1. Initial Roof Survey & Assessment
Every new roof installation begins with a detailed survey and assessment of the property. This stage is essential for understanding the condition of the existing structure and ensuring the new roof is properly planned from the very beginning.
The inspection typically involves assessing the building’s overall structure, accurately measuring the roof area, and identifying any visible or underlying structural concerns that may need to be addressed before work begins.
At this stage, roofing professionals will also discuss suitable material options based on the property type, budget, and performance requirements, helping to ensure the final specification is appropriate for the project.
Did You Know? Some roofing companies, including our team at Miller Roofing, undertake drone surveys to help carry out fast and detailed roof assessments, particularly for hard-to-reach or difficult-to-access roof areas.
2. Quotation & Planning
Next, a detailed quotation is prepared outlining the scope of the work required. This typically includes a breakdown of the recommended materials, labour, and any additional works identified during the assessment.
At this stage, the scope of work and chosen materials are agreed upon to ensure all requirements are clearly defined before the project begins. A suitable schedule is then arranged, taking into account factors such as property access, weather conditions, and project complexity.
Where necessary, arrangements are also made for scaffolding and other safety measures to ensure the installation can be carried out safely and efficiently.
3. Preparing the Site
Once planning is complete, work begins on preparing the property for the installation. This stage ensures everything is in place before any roofing work starts.
Scaffolding is typically erected to provide safe access to the roof and to allow work to be carried out at height. At the same time, surrounding areas such as gardens, driveways, and external features are usually protected to minimise disruption and prevent damage during the works.
Materials are then delivered to the site in preparation, and any necessary safety equipment, such as fall protection systems, harnesses, and edge protection, is set up in line with health and safety requirements.
4. Removing the Existing Roof (If Applicable)
Where an existing roof is being replaced, the first stage of the physical work involves carefully stripping back the current roofing materials. This is carried out in a controlled manner to expose the underlying structure safely.
The process typically includes removing old tiles or slates, followed by the removal of the existing underlayment and roof battens. Once the roof covering has been removed, the roof deck beneath is fully exposed.
At this point, the exposed structure is inspected in detail. This stage is important as it can reveal hidden issues that were not visible during the initial survey, such as deterioration of timbers or areas requiring repair before the new roof can be installed.
5. Structural Repairs & Roof Deck Preparation
At this stage, the underlying roof structure is prepared to receive the new roofing system.
Where an existing roof has been removed, any damaged or weakened timbers are repaired or replaced to ensure the structure is sound. In the case of a new build, the roof structure is checked to confirm it is correctly formed and ready for the installation process.
The roof deck is then ensured to be stable, secure, and level across the full surface. Where required, new battens are installed to provide a fixing point for the new roof covering and to ensure correct spacing and alignment.
6. Installing Underlay & Weatherproofing
The next stage is to install the essential weatherproofing layers that protect the building from water ingress and external conditions.
A breathable membrane or roofing felt is first laid across the roof surface. This acts as a secondary barrier against moisture, helping to prevent water from penetrating the structure while still allowing ventilation where required.
Flashing is then installed around vulnerable areas such as chimneys, vents, valleys, and roof edges. These details are critical in sealing joints and transitions where different roof surfaces meet.
Finally, attention is given to ensuring effective water runoff, with all layers installed in a way that allows rainwater to flow correctly towards gutters and drainage points.
Did You Know? Miller Roofing is a trained installer of RESTEC FLEXITEC, a high-performance liquid waterproofing system used for certain flat roof applications.
7. Installing the New Roofing Material
Once the weatherproofing layers are in place, the new roof covering is installed. This is the stage where the roof begins to take its finished form, and the chosen material is fitted across the structure.
Tiles, slates, or flat roofing systems are laid in accordance with the project specification and the roof design. Each section is secured carefully to ensure it is fixed correctly and able to withstand weather conditions over time.
Throughout the installation, attention is given to maintaining accurate alignment, as well as ensuring that appropriate ventilation gaps are preserved where required. This helps support the long-term performance of the roof and prevents issues such as trapped moisture or restricted airflow.
Also read: Flat Roofing Systems: Complete Guide
8. Finishing Details
Next, attention is turned to the finishing elements that complete the system and ensure it performs as intended.
Ridge tiles and hip components are fitted to seal and secure the highest points of the roof, helping to protect against wind and water ingress. These elements also provide a neat, finished appearance to the roofline.
Guttering and drainage systems are then checked and adjusted where necessary to ensure effective water flow away from the property. This helps prevent issues such as overflow or standing water.
Finally, all edges, joints, and junctions are carefully sealed to provide additional protection and ensure the roof is fully weather-tight.
9. Final Inspection & Cleanup
A final inspection is carried out to ensure all elements of the roof have been fitted correctly and meet the required standard. This includes checking the quality of the workmanship, confirming that all components are securely in place, and ensuring the overall structure is sound.
Following this, any remaining materials, debris, and waste are removed from the site. Surrounding areas are cleared and checked to ensure they have been left in a tidy condition.
At this stage, any relevant warranties or guarantees are typically provided. These may cover materials, workmanship, or both, depending on the system used and the scope of the project. Guidance on maintaining the roof may also be provided to help ensure long-term performance.
View this post on Instagram
How Long Does a New Roof Installation Take?
The duration of a new roof installation can vary depending on the size, complexity, and type of project.
- For smaller residential properties, installation can often be completed within a few days.
- For larger or more complex roofs, including commercial projects, it may take one to two weeks or longer.
However, several factors can influence the overall timeline, including weather conditions, the size and design of the roof, the materials being used, and whether any additional structural work is required during the process.
Choose Miller Roofing for New Roof Installation
If you’re considering a new roof, working with an experienced contractor can make all the difference to the outcome.
“We approach every new roof installation at Miller Roofing with a clear, structured process, combining experience and attention to detail to deliver reliable results for both residential and commercial clients,” says James Miller, Director
Miller Roofing specialises in high-quality roof installation in Surrey for both residential and commercial properties. Reasons to choose us include:
- A team with over 100 years of combined roofing experience.
- Fully insured and accredited roofing specialists.
- Trained installers of RESTEC FLEXITEC systems, backed by up to a 20-year manufacturer’s guarantee.
- Drone surveys available to support fast, accurate roof assessments.
- Clear, transparent quotes with honest, practical advice.
At Miller Roofing, Woking roofers, we have built our reputation on consistent workmanship, clear communication, and delivering reliable roofing solutions across Surrey, Berkshire, and Greater London.
To learn more about our services or request a quote, contact our friendly team at Miller Roofing today.